Please note, this is a DRAFT. If you have any difficulty or suggestions, feedback is welcome. Please email omar.wasow@pomona.edu.
Basic Setup: Step by Step
Go to https://rstudio.cloud.
Click
Sign upand create an account.
Entering Your Report Workspace (Standard)
For reports in POL90, you and your team will typically be assigned a workspace in which to work on your report. In the team assignment, you should see an invite link for an RStudio Cloud workspace next to your name.
If for some reason you are creating your own workspace, skip to “Setting Up Your Own Workspace.”
Once you have signed into your RStudio Cloud account, click on the invite link and join the workspace.
In “Projects,” click
New Projectto create your group’s report.Toward the top of the screen in your new project, click “Untitled Project” and rename your project (something like “Report2_proj” may work well).
Adjust the settings to make sure your teammates can view and edit the project:
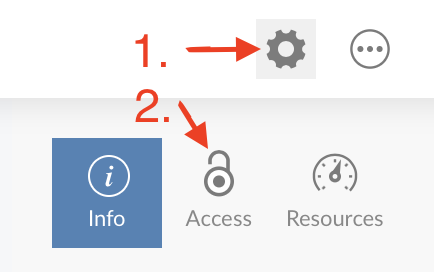
- click the GEAR icon in the upper right of the window
- click the ACCESS lock icon, and change the pop-up menu to EVERYONE in your workspace

Once this is finished, skip to “Uploading Files & Data.”
Setting Up Your Own Workspace (Beyond POL90)
- Once you have an account and are logged in to RStudio Cloud, click the three lines in the top left corner (next to “Your Workspace”).

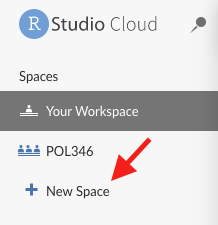
In the left-hand sidebar menu, under “Spaces,” click
New Space. This will create a workspace that allows
multiple RStudio Cloud users to edit project files. (Projects created in
the default workspace, “Your Workspace,” will only be editable by
you.)

- Once you have entered your newly created workspace, click the GEAR icon in the upper right corner to name your workspace (something like “POL90”).

After navigating back to “Projects,” click
New Project.Toward the top of the screen in your new project, click “Untitled Project” and rename your project.
Adjust the settings so you can share this project with teammates:
- click the GEAR icon in the upper right of the window
- click the ACCESS lock icon, and change the pop-up menu to EVERYONE in your workspace

- To invite your teammates to edit your project, you will have to
invite them to the workspace. Navigate back to the workspace and click
on
Membersat the top of the screen. Then clickAdd Member. Be sure to make your teammates “Admins” or “Moderators” so that they can edit projects created by you or other team members.

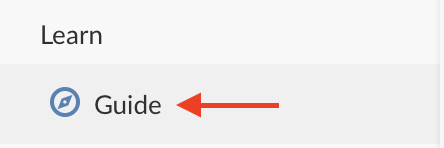
- See the GUIDE in the left navigation for more detail on sharing and saving or follow this link: https://rstudio.cloud/learn/guide

Uploading Files & Data
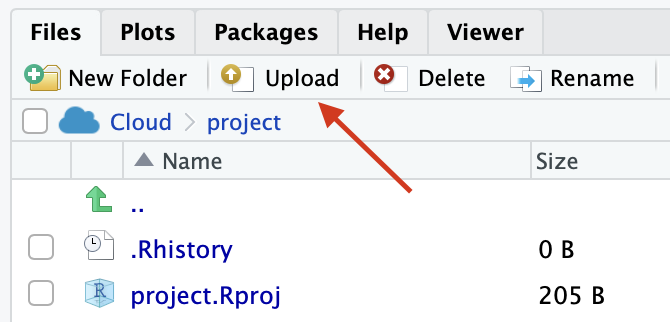
- To upload your Rmd files and data, find the FILES pane \(\rightarrow\) UPLOAD tab.

If you are having trouble reading in data, see this link: https://www.youtube.com/watch?v=GaUE-d7tnNo.
For more detail on uploading, see this link: https://support.rstudio.com/hc/en-us/articles/200713893-Uploading-and-Downloading-Files.
Note: According to the RStudio Cloud guide, “each project is allocated 3GB for files and data, and another 3GB for packages.” You may also find that uploading overly large data files may slow down your project’s loading and knitting times. To circumvent this, try to upload preprocessed “working” data rather than full “raw” datasets whenever possible.
- You will need to install packages. If you are only using a few
packages, the fastest solution will be to run
install.packages()for those specific packages.- A simple but slower solution is to install all the packages that we
recommend for POL90 by copying and pasting the following command into
your RStudio Cloud console (this will take a few minutes:
source("http://pol90.com/POL90_2020_packages.R")
- A simple but slower solution is to install all the packages that we
recommend for POL90 by copying and pasting the following command into
your RStudio Cloud console (this will take a few minutes:
Tips for Team Management and Workflow
- When uploading files and data: Note that you can
create folders on RStudio Cloud with
New Folder. Creating a “data” folder to keep multiple files, or data and codebooks together, may be helpful. - Be aware that only one person can edit your project at a
time. There are several ways you and your teammates might work
around this:
- Notify your teammates when you open the project for editing, and notify them when you’ve finished editing.
- Have each team member work on a section of code on their own computer, and copy-paste the code into a more freely editable medium (e.g., Google Document) that can eventually be transferred all at once to the RStudio Cloud project or one team member’s local Rmd file. Consider dividing the work by defined sections of the report like Methods and Results, or by code type (e.g., data scrubbing, plots, tables, etc.).
- Appoint one team member as the “editor,” and work together on a Zoom call while your editor shares their screen.
- Before submitting your report: Have one team member download your project file and make sure that everything knits properly. This team member can then submit to Blackboard on behalf of the entire team. For reports that require each team member to submit, the team member who originally downloaded the file from RStudio Cloud can email their copy to the rest of the team.